INTRO
May this bonnet be a testament to the fact that necessity breeds innovation. After I was struck with a powerful urge to knit a chapeau of this style, a search led me to the realization that no such pattern exists (for adults anyway…per usual, my desired mode of dress is reserved for humans under 2 years old).
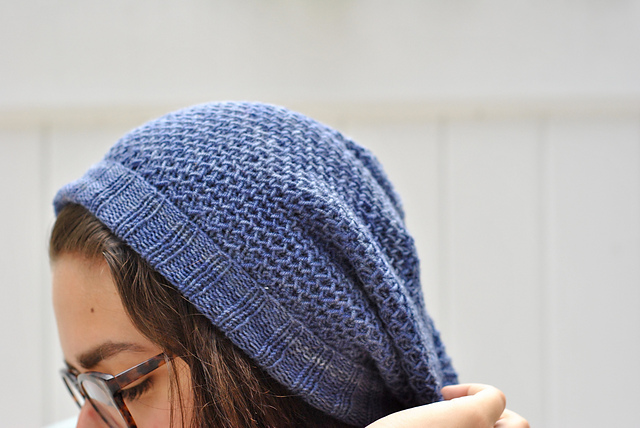
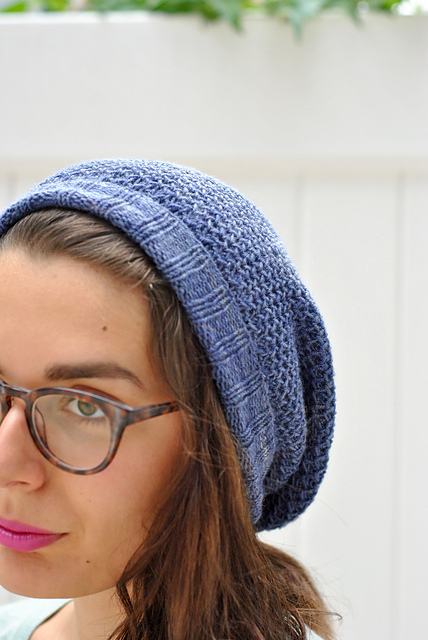
Well, I thought, time to brush off my patternmaking skills and put together the hat of my dreams. After a few attempts, I developed “21st Century Austen Heroine” so named after the fact that it is both romantic and a little odd – just like my favorite characters.
The bonnet can be worn fastened for an elegant look, or untied for an effortlessly cool vibe. While I chose a neutral shade to match my winter wear, I think this would look equally incredible in a vibrant shade.
However you decide to rock your bonnet, may your chilly days be filled with wit, warmth, and love! ♡
MATERIALS
- Size 3 circular needles
- Size 3 straight needles
- Approximately 275 yards of fingering weight yarn
- I used Diamond Laine Elmer in the colorway “Cashew”
- Shout out to “The Lamb & Kid” on Bainbridge Island, WA, where I purchased this yarn. It’s one of the most beautiful fiber shops I’ve ever been to!
GAUGE + FINISHED DIMENSIONS
1” wide = 5 ½ stitches
1” tall = 8 stitches


THE PATTERN
BACK OF THE HEAD
Cast on 33 stitches.
Row 1: Slip 1 stitch, knit 32 stitches.
Row 2: Slip 1 stitch, purl 32 stitches.
Repeat Rows 1 & 2 until your piece measures roughly 9” long, unstretched.
Cut the working yarn.
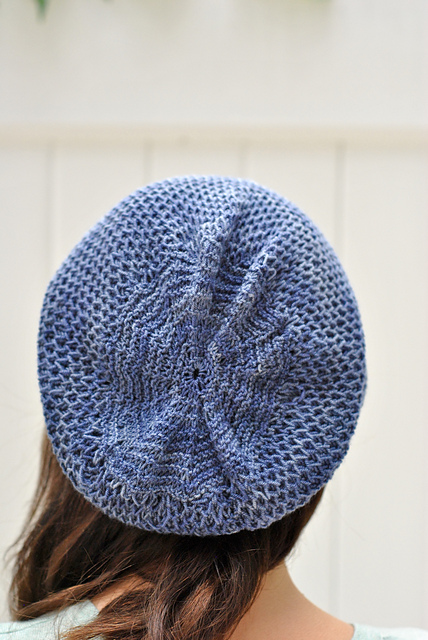
SHAPING THE HEAD
You will now begin shaping the crown of the head. To do this, you will pick up and knit the sides of your piece, and continue knitting back and forth. If you have ever knit a sock, this stage is going to look very similar to picking up the heel flap. If you haven’t knit a sock, ignore me and forge on!
With the right side of the fabric facing you, use one of your straight needles to pick up 33 stitches alongside the left edge of your piece.
Then, use another straight needle to pick up 33 stitches along the right edge of your piece.
You should now have a total of 99 stitches across your three needles. You can continue working across three needles, or move all stitches back to the circular needle (it might be a little tight at first, so you may want to work a few rows across three needles before transferring).
Row 1: With the RS of the fabric facing you, knit across all 99 stitches.
Row 2: With the WS of the fabric facing you, purl across all 99 stitches.
Gradually, you will see the crown of the head begin to take shape.
Continue knitting Rows 1 & 2 until the piece measures approximately 9.5 inches tall, and – when laid flat and folded in half – 7.5 inches across at its widest point.
End on a RS row.
For a larger, deeper bonnet, you can continue knitting, but you will want to stop approximately 1 inch less than your desired length.
FINISHING THE HEAD
You will now create the garter stitch edging on the front of the bonnet.
Row 1: With WS of the fabric facing, knit all stitches.
Row 2: With RS of the fabric facing, knit all stitches.
Rows 3, 5, 7, 9: Repeat Row 1.
Rows 4, 6, 8: Repeat Row 2.
Row 10: Cast off using your preferred method. I used the “Jenny’s Surprisingly Stretchy Bind-Off” method, but any bind-off will do.
Cut the working yarn.
ADDING THE TIES
You will now add the bottom brim of the hat and the ties in one fell swoop!
Row 1: Using your circular needle, cast on 75 stitches.
Then, with the RS of the hat facing you, pick up the bottom edge of the hat. The size of the hat will dictate just how many stitches you pick up. Using my gauge and dimensions, I picked up a total of 78 stitches. The most important thing here is to ensure you pick up an even number of stitches on both sides of the hat, with the back of the hat as the midpoint.
After you have picked up the bottom edge of the hat, cast on an additional 75 stitches.
Your circular needle should now have a total of 228 stitches ready to knit.
Row 2: With WS of the fabric facing, knit all stitches.
Row 3: With RS of the fabric facing, knit all stitches.
Rows 4, 6, 8, 10: With WS of the fabric facing, knit all stitches.
Rows 5, 7, 9: With RS of the fabric facing, knit all stitches.
Row 11: Cast off using your preferred method. I used the “Jenny’s Surprisingly Stretchy Bind-Off” method, but any bind-off will do.
Cut yarn and weave in all ends.
Go forth and be fabulous!